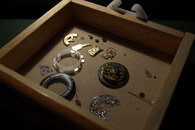
I suddenly have a new respect for watchmakers. As you may recall, I have an obsession with cheap, Chinese mechanical watches. I received this Goer skeleton watch for Christmas, but the filigree designs on the front were just a sticker, and a misaligned sticker at that. I resolved to remove it.
Oh, before I go further, I apologize for creating a zillion blogs back-to-back. The first two blogs were blogged for the sake of blogging, but this one is motivated by a desire to share something cool. That means it has artistic authenticity, and you must therefore excuse and even applaud my spamming. Culture demands it! Postmodernism demands it. Art demands it. (I also have a year of not-blogging to make up for.)Back to the task at hand - removing the superfluous sticker. Opening the screw back was easy, but I had some trouble with the chrome spacer ring (the thing behind the Roman numerals). I initially thought it was plastic and would just fall out, like similar watches, but it's some sort of very brittle metal. I tried screwing it out, but the threads around the inner case wall must be for some other configuration. Turns out it's a key/slot design and must come out exactly straight. Unfortunately, I became frustrated and pried a little too vigorously on the movement itself with a nylon spudger.This caused a piece of the frame to bend. The particular piece of frame contained three pink bearings, one of which holds the pivot for the regulator cog wheel. (I'm making these part names up as I go.) The cog wheel came out of the bearing and started rolling around. I tried to put it back, but figured I must have broken it in the process. You can see how it's tilted over and touching the frame.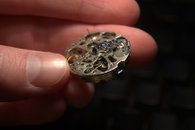 I resolved to disassemble the watch movement. The tiny screws stopped me. These aren't just any small screws, like laptop of eyeglasses screws. These are smaller than rice grains. I tried all my screwdrivers and even knife blades to no avail. Eventually I gave up and put all the parts in a drawer. Then I ordered a set of cheap, Chinese watch screwdrivers and waited for them to arrive. Ordering another watch would have been cheaper, but Amazon Prime arrives much faster than DX, and I'm stubborn.
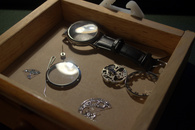
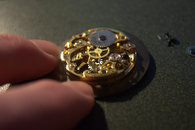
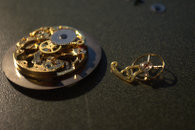
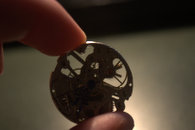
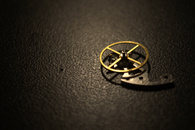
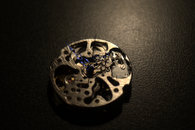
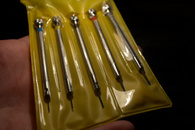 Once I got the screwdrivers, I took the movement out again and removed the offending plate on the back. I forgot to take a picture of it totally assembled, but you can see the piece sitting in the background. The shot on the left is purely a glamor shot. The middle shot reveals the problem. See where the two yellow gears intersect each other's arcs? Look just to the left of the left-hand intersection, and you will see a tiny gear with a glint of light on top. That glint of light shouldn't be there. It's the broken pivot, which is now too short to stay in the bearing. What to do now? I remember that I have another cheap, Chinese watch. This one is self-winding and looks nice, but it's ridiculously huge and heavy on my skinny wrist. The Goer watch I wish to repair has a 2650S movement, and the Cjiaba watch I don't like has an extremely similar movement with an additional layer of stuff for the self-winder. It might be the HZ2189G.
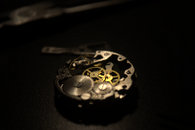
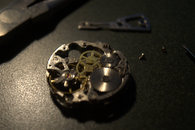
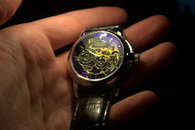 Here I've taken the Cjiaba apart and expose the movement. I'm not bothering to remove the faceplate. Once I remove the self-winder, you can see the fantastically small ball bearings underneath (middle). I started to remove the super-tiny screws off of the top with my smallest screwdriver, but decided to try the larger silver ones instead. I'm so glad I did, as I probably would have lost some of the balls. The third photo show what's underneath the ball bearing layer.
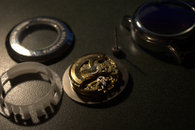
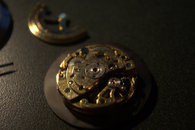
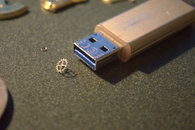
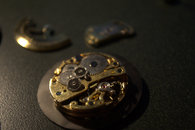 Now I'm comparing the two pieces of the frame (left). The holes line up properly, so I'm encouraged. I notice about this time that my pliers are magnetized, and now all my watch screwdrivers are also magnetized. What a pain! I can't set stuff down without using two tools. I'll note that I'm not actually touching anything but the edges of the movements with my fingers, as I don't have finger gloves and don't want oils all over everything. I make a mental note to get a magnetizer/demagnetizer tool. I proceed to remove the matching gold frame piece (right). Notice the ridiculously small gear on the tip of my smallest screwdriver.
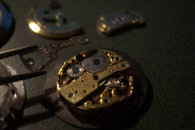
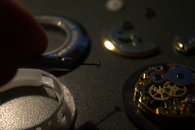 I spent a few moment pondering what I should do next. The layers of gears are getting increasingly complicated, and I'm afraid I will start getting stuff mixed up. Maybe, just maybe, I can cheat and work the cog wheel out from here. In the left photo, you can see that I've unscrewed one of the large silver mainspring gears (left-handed thread, btw) and lifted out the lower of the two big yellow gears. I still can't quite get the cog wheel out, so I remove the flywheel (middle). This part was nerve-wracking, as the spring is about as thick as a hair and very fragile (I assume). After removing the screws, I lifted it out by poking one screwdriver through the frame and another through the wheel in an X shape, thereby keeping them from separating and stretching the spring. Now I can finally remove the cog wheel (right)! I gave up after a while of fiddling and shook the whole thing until it fell out. Lame, I know. That tiny little washer also fell out. I was very nervous, because I didn't know where it came from, but if you've been paying close attention to the photos you'll already know the answer.
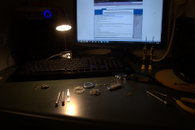
 Here's a little perspective on my desk. Makes it all look rather insignificant, doesn't it?
 I then removed the mainspring gear from the silver movement. Now I know where the tiny washer came from. I'll skip ahead to the point where I've removed the offending cog wheel. You can see the two compared side-by-side.
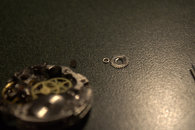
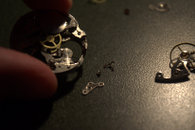
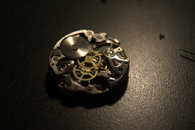
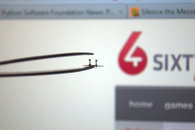 Putting things back together proved to be much trickier than getting them out, as we all know. I fiddled and fiddled, trying to get the good cog wheel into the silver movement. I finally decided to remove more pieces. In the first photo, I've removed the armature that ticks back and forth on the cog wheel. It fell out with a bit of a bounce, and I lost track of which way was right-side up. Now the cog wheel went in smoothly, and I spent a while getting the armature back in properly. In the second photo, I have the flywheel and most of the gears back in. You can see the "new" cog wheel pivot (with a tiny gear on top) next to the yellow gears. Once it was all back together, it didn't work. The armature and cog wouldn't do their little thing, even after the winding it and giving the flywheel an encouraging push. The flywheel spun halfway and then bounced hard. The third photo shows the pink jewel-thing that's supposed to be ratcheting on the cog wheel, but isn't. There are actually two pink jewel-things, but the other ones isn't visible.
 Peppermint tea break.
 I stretched my (very tense) shoulders and pondered for a while. If the flywheel wouldn't spin, it must be hitting something. How did the flywheel make the armature rock back and forth anyway? I went back and looked at the photo of the armature. Ah, there's a little three-pronged thing on one end of the Y. The flywheel (should I be calling it a pendulum?) must somehow smack it back and forth.I also wondered if (shudder) the flywheel had to be wound to some particular tension. I'd never be able to figure that out by trial and error, though I'd been careful not to let it spin free. It might have worked its way half a turn or so. Then I recalled a mechanical chess clock I repaired for another student last semester. It's regulator spring was in a completely relaxed position, and didn't work at all if I were even a single turn from where it wanted to rest naturally.With great hope, I removed the flywheel again. Sure enough, when I let it spin free, it wasn't under tension. Now I have another problem. How do I get it back in the movement without moving it from center? Placing it upside-down and lowering the whole movement onto it worked! It was also fun to play with the wheel while it was spinning free. You will notice the pink jewel-thing on the wheel - that's what smacks the armature.
 I put it all back together, and it ticks again! You can see the flywheel and second hand blurring slightly.
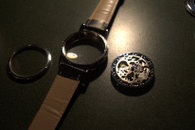
 Here's the movement placed back in the chrome spacer, and here's the completed watch. (Two and three were taken under a much softer light.) This watch is now completely unique.
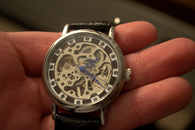
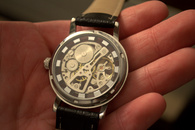 The verdict? It still isn't perfect. [;(] Apparently my former abuse of the spacer paid off, because the movement rattles a little. When it rattles and shifts, the second hand tends to press against the glass and slow the watch down. I took it out again and fiddled, but it still rattles. I'll probably spend another $10 and buy the watch again. At least I have experience and plenty of parts. I suppose I could clip the second hand short to fix the speed, but it would still rattle.I spend about 3.5 hrs doing the actual repairs and a few more hours massaging the photos and writing this text. Oh, what about that Cjiaba watch? I was quite tired, so I stuck it all those bits back in the drawer.